Many budding artists wish they knew how to use oil paints but are put off by the belief that oil painting is too ‘difficult’.
It’s true that learning oil painting isn’t always easy – oils are a very technical medium. However, that’s no reason to think you can’t get the hang of the oil painting basics relatively quickly.
With a little patience and dedication you could soon be painting your very own masterpieces!
Our step-by-step guide below explains the basic tools that an oil painter needs and their uses.
How to Use Oil Paints – Essential Materials Checklist
 In the next section we list the essential materials you need to begin oil painting. Then we go on to explain a little more about each item in the sections below.
As with most artistic endeavours, oil painting materials can be expensive, so it is perfectly fine to buy student grade materials whilst you are learning.
In fact, some successful oil painters never use anything else!
Most of all though we would encourage you to experiment. The precise combination of materials and set-up that works best is often different for every artist.
Oil Painting Basics – Essential Oil Painting Materials Checklist:
- Oil paints
- Surfaces, such as canvas or board
- An easel
- Brushes
- Solvent or solvent substitute for brush cleaning
- Medium or linseed oil
- A brush cleaning jar
- Paper towels or rags
- A palette
- A palette knife
- Drawing implements
- An apron or smock
Also useful:
- A stool or chair
- A tonal value scale
- A daylight lamp or bulb
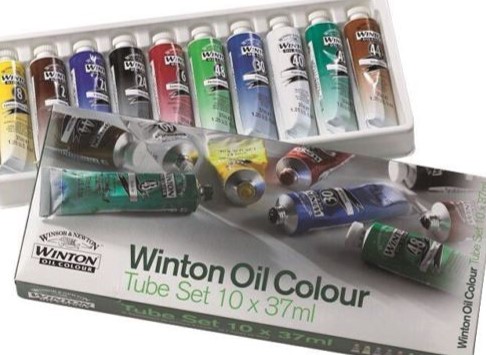
1 – Oil Paints:
The Main Categories
There are many different categories of oil paint available. The main differences between them are:
- The Brand – some brands of oil paint are creamier, some are stiffer. Which you prefer will depend a lot on your painting style;
- Artist vs Student Grade – more expensive ‘artist’ grade oil paints have more pigment and less filler than ‘student’ grade paints. This makes them brighter and (theoretically) longer-lasting;
- Thinning agent – water-mixable oil paints are now available. These don’t require solvents to thin them or clean the brushes as traditional oil paints do.
Colours
There are many different oil paint colours available. When you are learning how to use oil paints it is preferable to start with a limited palette.
The most limited palette, the ‘Zorn Palette’- named after the artist Anders Zorn – only contains 4 colours. These are Red, White, Yellow Ochre, and Black.
This palette is particularly effective for a classical style of portrait or figurative oil painting.
As well as Anders Zorn, Rembrandt and Velasquez used versions of this palette very effectively.
However, when you are first learning to use oil paints we would recommend something a little more flexible than the Zorn Palette, but still quite restricted.
In our view, these are the essential oil colours:
- Titanium White
- Lemon Yellow
- Cadmium Red
- Alizarin Crimson
- Ultramarine Blue
- Burnt Umber
For portraits and figures you may want to add Terre Verte and Yellow Ochre.
For landscapes you may wish to add Viridian Green and Cadmium Orange.
However these are not essential and it is possible to easily mix 99% of other colours from this basic palette of 6 colours.
Most importantly your painting will retain a lovely harmony if you use a limited palette.
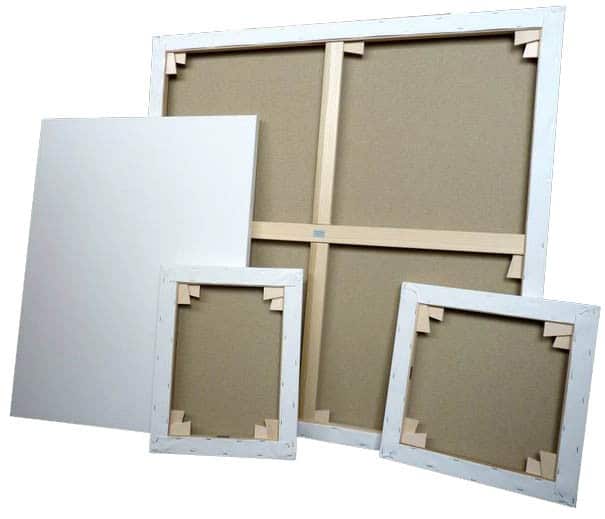
2 – A ‘Surface’:
‘Surface’ is very simply a generic term for canvas or board or any of the other types of material you can paint on with oil paints.
The most common types are:
- Canvas
- Canvas board
- MDF board
- Oil paint paper
Artists also paint on other, more exotic surfaces, such as copper, aluminium, salvaged wood, and glass (to name a few), to achieve specific paint effects.
Whatever surface you choose, it will generally have to be primed to prevent the oil paint disappearing into the fabric and also to give an even surface to paint on.
Most store bought surfaces will be ready primed, or you can prime your own surface yourself if you choose, with acrylic gesso. Gesso is readily available from art shops.
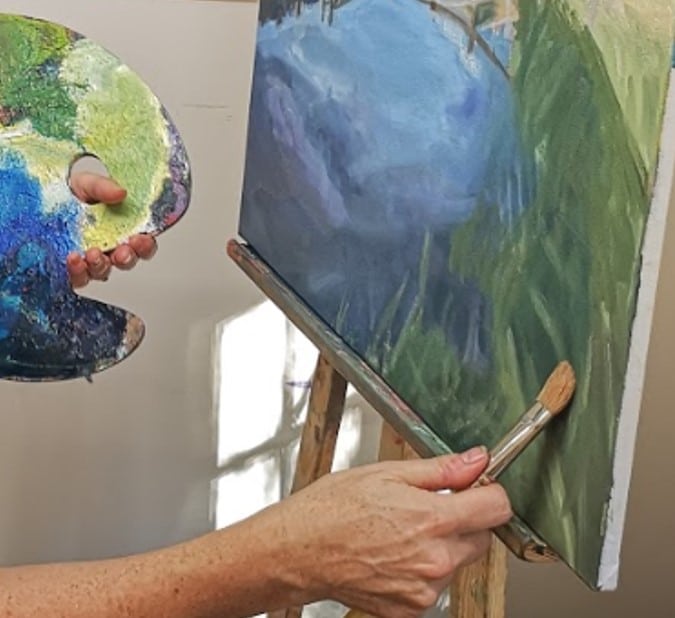
3 – An Easel:
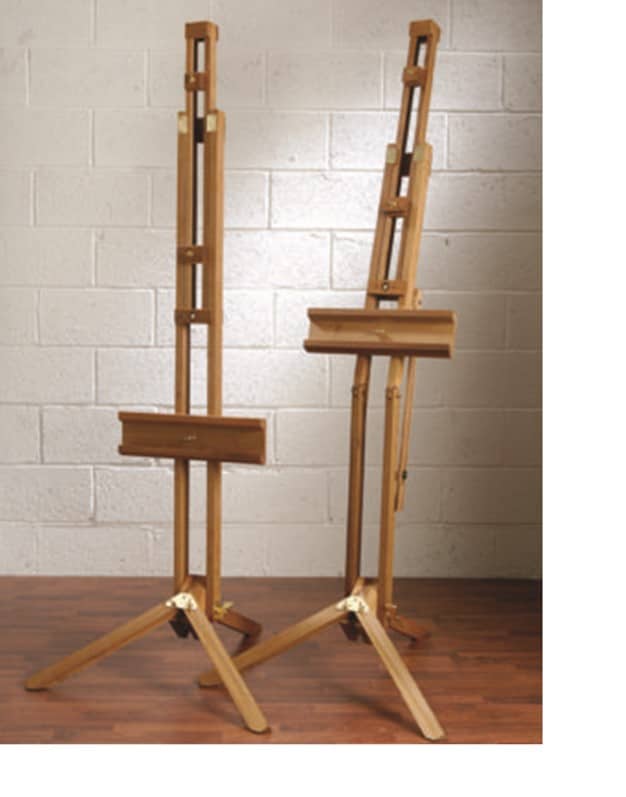 For successful oil painting it is generally accepted that you need an easel.
This is because you need to be able to look at what you are painting directly in front of you without your perspective being skewed.
Whether you are working from life, from a photo, or even from imagination, this is still the case.
It is also vital to be able to step right back from what you are painting from time to time and view your work from a distance. This is much easier with an easel.
There are many types of easel available and you may eventually end up with more than one. (I have 3 and am considering adding another for outdoors oil painting, also known as ‘plein air’ painting.)
The most versatile easels tend to be the ‘radial’ easels, and these can be picked up for £50 or even less (at the time of writing, October 2018).
If you don’t want to commit that much money to begin with, then you can find easels for as little as £15 or £20, just be aware that they may be less robust.
The most important thing to consider when buying an easel is that it will take the size of surface you want to work on (for example if you want to work quite large).
Also, if you want to sit down to paint, check that it will work with either a low or high stool, depending which you prefer.
4 – Brushes:
There are many different types of brush suitable for oil painting.
First of all you should decide whether you want to use hog hair bristle brushes or synthetic brushes.
Hog Hair Brushes
These are the traditional oil painting brush. They are durable and hard-wearing, and are capable of making very exciting and dramatic marks.
They tend to be more expensive than synthetic brushes and of course are not animal friendly, if that is important to you.
Synthetic Brushes
There are many very good quality brands of synthetic brush on the market (and some not so good).
They are generally cheaper than hog hair brushes and can last longer.
The marks made by synthetic brushes tend to be softer so can be a good choice if you prefer a blended look to your paintings
Sable Brushes
Sable brushes are traditionally used for watercolour, however they can be very useful in oil painting for adding very fine details.
Just be sure to clean them thoroughly and apply a little linseed or walnut oil to the hairs before storing.
Shapes of Brush
There are around 8 main brush shapes, most of which are available in a vast range of sizes:
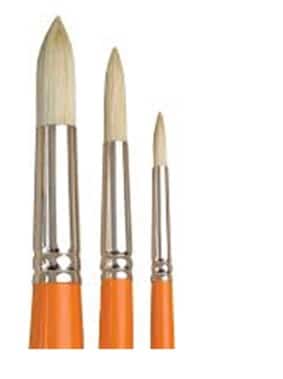
Round: round with a pointed tip
- Useful for making soft smooth marks, such as when representing hair, or grasses in a landscape
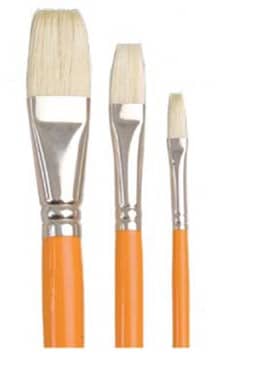
Flat: flat with a square end
- A popular, versatile brush that gives the artist a lot of control. Can be used to make flat, wide marks, or thin marks when turned on its edge. Often used in modern, contemporary paintings.
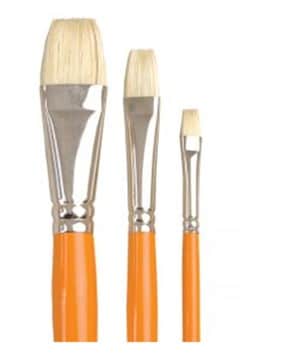
Bright: flat and square with very short bristles
- Used to make short, thick marks. Can produce interesting and dynamic effects.
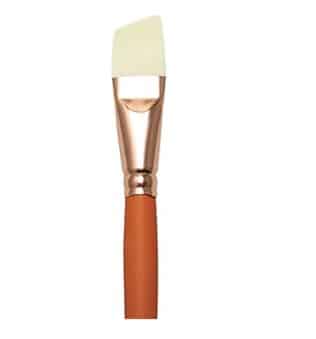
Angled Bright: flat with an angled end
- A specialist brush useful in landscape painting to recreate the impression of various types of terrain
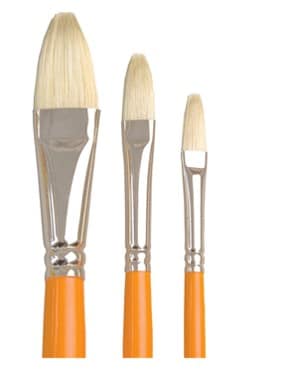
Filbert: flat with rounded ends
- Another very versatile brush which can be used for almost any oil painting task.
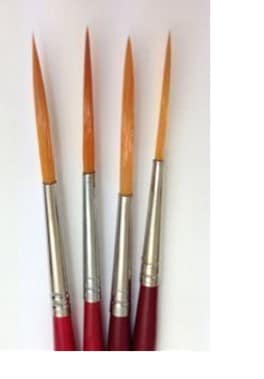
Rigger: a very long, thin, round brush
- Historically used to paint the rigging in ships – hence the name. Suitable for drawing lines.
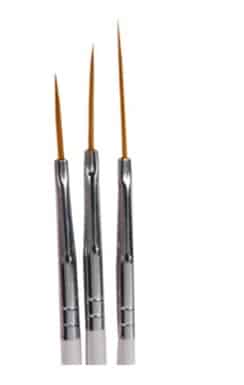
Fine-liner: round and very thin with a point
- The finest of all brushes, used for painting in very small details
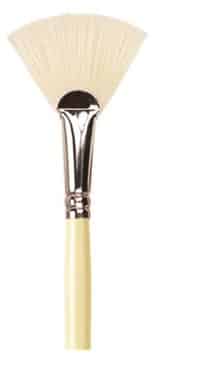
Fan: flat and fan shaped
- A specialist brush very useful in landscape for painting water, foliage, and other plants
Sizes of Brush
In the world of brushes, 0 is small and 10 is large.
Brushes usually go up to around number 20 or 24, or if a larger size is wanted, then flats can be bought in 1 inch, 2 inch, 3 inch sizes (etc), rather like household paintbrushes.
Slightly unhelpfully the different manufacturers use different sizing systems, so a size 8 in one brand may be smaller or larger than a size 8 in another.
To get around this problem we would recommend going to a good art supply shop to buy brushes for the first time, so you can hold them in your hand and assess what you need.
5 – Solvents and Solvent Substitutes:
Solvents and solvent substitutes are used for 2 main purposes in oil painting:
1. To clean brushes during and at the end of a painting session
2. To thin down paint, particularly in the early stages of a painting
Solvents are generally fairly toxic to humans and the environment, which is why non-toxic solvent ‘substitutes are becoming increasingly popular.
If you use solvents then please take care to dispose of them responsibly. They shouldn’t go down the sink or into the domestic water system in general.
Solvents:
The most common solvents used with oil paints are:
 1. Turpentine
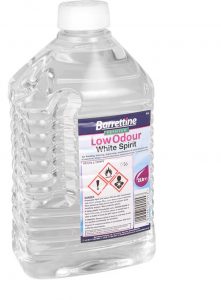
2. White Spirit
3. Odourless Mineral Spirits
Odourless Mineral Spirits are really a form of white spirit and are still toxic, despite the much reduced smell.
Turpentine is the traditional solvent used with oil paint but is slightly more toxic than White Spirit. Both act in a similar way.
The jury is out on whether you need to by artist grade versions of these products or whether domestic versions will do – e.g. from a DIY store.
Domestic versions are significantly cheaper, so our advice would be to use these whilst you are learning to paint, then experiment down the line with artist grade versions and decided if you feel they make much difference. Odourless white spirit is a good first time solvent for an oil painter starting out.
You should always use solvents in a ventilated room. We also recommend using a jam jar and replacing the lid each time you clean your brush, so that as little as possible evaporates into the air.
If you start to get headaches or nausea, then you should stop painting and go and get some fresh air. If these start to occur every time you paint then it is probably time to think about switching to a solvent substitute.
Solvent Substitutes:
There are several solvent substitutes on the market. Perhaps the best known is ‘Zest-it‘ which is made from oranges.
Zest-it produce a large range of products aimed at making painting safer for the artist.
There is an argument to say that solvent substitutes are not as effective as solvents.
However you may consider this an acceptable trade-off when weighed up against the impact of solvents on yourself and the environment.
Essential lavender oil and walnut oil are also meant to be able to used as brush cleaners. We don’t have any direct experience ourselves so can’t comment, however you may wish to research more and give them a try.
A Note on Cleaning Brushes:
When you are cleaning your brushes at the end of an oil painting session, you should aim to get as much paint out of the brush before using the solvent.
You can do this by taking a rag or some kitchen towel and gently squeezing the bristles along their length, starting at the ferrule. Do this a couple of times.
Once you have rinsed off the remaining paint, you should then wash your brushes with soap and water. This helps to keep them in good condition (brushes are expensive!).
If you are using sable brushes for fine work, then massage a little linseed or walnut oil into the bristles before storing them away for next time.
NB. You should NEVER leave your brushes standing up in your jar of solvent or brush cleaner whilst you paint.. This is because the paint residue collects at the bottom of the jar and will soon ‘gunge’ them up, meaning that you will need to replace your brushes much more frequently.
6 – Oil Painting Medium:
 Oil painting medium is used to thin paint whilst painting for easier application.
Depending on your painting style and the brand of paint you are using, you may not need any medium at all.
There are 3 main types of medium that oil painters use:
1. Natural oils, typically linseed oil (the most common), walnut oil, or safflower oil.
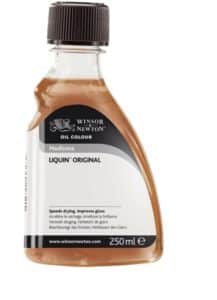
2. ‘Manufactured’ mediums, readily available. ‘Liquin‘ by Winsor & Newton is probably the best known of these.
3. Half solvent and half oil or manufactured medium – a popular choice, usually mixed by the artist in the studio
Manufactured mediums have the ‘advantage’ of quicker drying times, if that is important to you.
However many oil painting purists prefer Linseed Oil, which is the traditional medium and has been used since time immemorial.
Again, it is best to experiment with different mediums as well as no medium, to find out what suits you and your painting style the best.
7 – Brush Cleaning Jars:
You will need plenty of jars to store solvent and mediums, and to clean your brushes, so start collecting now!
You can use jam jars, mayonnaise jars, or similar.
If you prefer you can buy specialist brush cleaning pots which have a separate compartment in the bottom to catch the paint residue as it settles to the bottom.
These are a good option as they mean you will waste less brush cleaner, which is good for your pocket and for the environment.
You can also make something similar yourself if you’re looking for ways to save money – see here.
8 – Paper Towels or Rags:
It’s important to keep your brush clean between strokes, particularly when you are moving between colours which may dull or muddy your work.
It is possible to buy large bundles of rags in 10kg bags quite cheaply. If you are painting a lot, or painting large scale, you may find this a worthwhile investment.
Otherwise kitchen towel or blue DIY towelling work very well. Just bear in mind you will get through quite a lot!
9 – A Palette:
You will need something to mix paint on.
Your palette should be as large as possible to allow plenty of room for mixing without muddying the colours.
You may even choose to use more than one palette at a time for a painting. For example if you are working on a landscape with a dramatic sky, then you may use a palette just for mixing the sky colours.
Palettes come in all shapes and sizes. The main types are
1. Wooden:
The traditional painters’ palette which has the advantage of being a mid-tone colour, making it easier to judge tonal values as you paint. Needs more care than the other palette types, and make sure you ‘season’ it with oil before you use it for the first time.
2. Plastic
The modern alternative to wood, versatile, easy to clean, and available in many shapes and sizes.
3. Glass
In our view one of the best palette options as it is very easy to mix on glass, and also to clean at the end of the day. If you want to go this route then the best bet is just to buy a piece of toughened glass cut to size.
4. Paper / Disposable
A cheap, simple option which means you don’t have to clean your palette after each painting session – you just throw it away.
You can also create a cheap, DIY palette at home yourself, by taping some greaseproof paper to a flat surface such as a chopping board, or even to a table. Just throw it away when you’re done.
10 – Palette Knife:
Palette knives have 3 main purposes:
1. To mix paint colours on your palette: this allows you to get a smooth mix of a large quantity of paint which can be useful depending on your preferred painting style.
2. To add paint to your canvas: it is possible to create an entire painting using nothing but a palette knife. You can also buy specialist palette knives in different shapes to create specific paint effects in landscape or abstract painting.
3. To remove paint from your canvas: this is called ‘Tonking’ after the (in)famous Henry Tonks, an art tutor at the Slade School of Art in the 1930s. If he didn’t approve of the work a student was producing in class, he would remove it from their canvas with his palette knife – rather disconcertingly!
It is possible to paint in oils without ever using a palette knife, however we would recommend you try out all 3 of the palette knife uses above, to see if any of them are useful to you.
11 – Drawing Implements:
Many artists loosely ‘draw’ their composition straight onto canvas with a brush.
However when you are starting out you may prefer to create a more structured drawing first. This will give you confidence as you start to paint.
A mid-range pencil such as an HB or B, or charcoal are the best drawing implements for this purpose.
12 – An Apron or Artist Smock:
Oil painting can be a messy business and oil paint is difficult to remove from clothes.
We recommend investing in a couple of heavy-weight artist aprons or smocks.
Or if you don’t want to spend the money, old shirts can do a similar job of protecting your clothes.
Non-essential items
The following items can also be useful when learning how to oil paint:
13 – A Painting Stool or chair:
Not an essential for all artists (I personally paint standing up), but I appreciate that learning how to oil paint can be hard on the feet!
If you prefer to use a stool or chair, even if only occasionally, then decide whether you want to work low down or higher up.
As with any chair or stool, it comes down to what you find comfortable – with or without a back, adjustable, a padded or unpadded seat.
Again, there are many types on the market and it is just a case of finding the right one for you.
14 – A Tonal Value Scale:
When you are starting out with oil painting (in fact, any painting), you will need to learn how to ‘see’ and recreate tonal values, otherwise your paintings will look ‘off’.
A very helpful tool to do do this is a tonal value scale.
This is a printed piece of card that displays a range of 10 values, from black through to white. It allows you to check whether you have painted an area of your work too dark or too light and helps you adjust.
You can easily buy these online, or even print one out.
15 – A Daylight Lamp or Bulb:
If you are painting at different times of the day, and aren’t lucky enough to have a North facing studio (yet!), then it is really worth investing in a daylight lamp.
These will keep the lighting consistent no matter what time of the day you paint.
If you don’t have dedicated studio space, then a free-standing daylight lamp or 2 can be bought quite cheaply and will make a great difference to how you ‘see’ your tonal values and colours as you paint.
If you have a dedicated room for painting, then it can be worth installing a daylight strip light. Again, these can be bought reasonably cheaply, just make sure you buy one that is appropriate to the size of the space you are using. There is such a thing as having the light too bright!
We hope you have found this guide to the Oil Painting Basics useful.
If you have any questions or comments at all, please feel free to get in touch, we would love to hear from you.